 “Press on toward the goal to win the prize for which God has called me”- phill. 3:14 .. We all have been created with his works in mind, to achieve a goal, be a success in his eyes.
With the busy holiday season upon us and a new year breaching, a fresh new office update can make us feel less chaotic,and more serene and organized. A crisp clear light to keep an open feel. Chalk pencils to write those labels with ease- labels? Yes please! these rustic bark labels are adorable!! Cooler nights and days mean fur chairs are that much more inviting. A sleek white desk with gold accents creates a clean slate for tasks. A rich, vintage inspired rug grounds the room.
The clean look of this planner is even more appealing inside- keeping organization at best ( I must confess too, I am obsessed with stationary of all kinds!) file organizers, a fancy tape measure ( move over boys this ones for the ladies! I mean how cute!!.. Perfect for those kids costumes, school projects and you know all that fabulous decorating you do! ) and a tassel power bank all keep a monochromatic look. Lastly giving the room a gracious and rich feel, a gold mirror with petite scrolling. So sink in.. Feel a new start and conquer tasks with ease!
Copyright Jessica Jansma Photography & Design/Patina Gray Interiors
Visit : http://www.anthroplogie.com for sources.

Modern Fall

I’m so excited to share these items with you all! I love neutral colors and these items flow seamlessly through the season.
1. Pom Pom Crochet Knit Throw- Pottery Barn
2. Driftwood Bowl- Pier 1
3. Beaded White Pumpkin Pillow- Pier 1
4. Park Hill Lantern- Pottery Barn
5. Rose Hips Wreath – Pottery Barn
6. Galvanized Pumpkin Pillar Holder- Pottery Barn
7. Warren Pulley Task Table Lamp – Pottery Barn
8. Antique Mercury Glass Taper Holder – Pottery Barn
9. Preserved Wheat Stack Arrangement- Pier 1
Bringing in soft neutral colors on items that reflect fall, such as pumpkins can also help blend or pop your decor from season to season. Using soft, textured linens keeps loved ones warm at night, while leaving a cozy, inviting atmosphere in a room. Try leaving a supple fur throw on a guest bed, for travelers to sink into when they arrive. Galvanized candle holders and lanterns reminisce of the crisp air, while leaving a farmhouse touch to any fall decor. Touches of Antique Mercury glass add richness and class to any room.
What are your favorite fall trends?
Thank you door stopping by,
Jessica
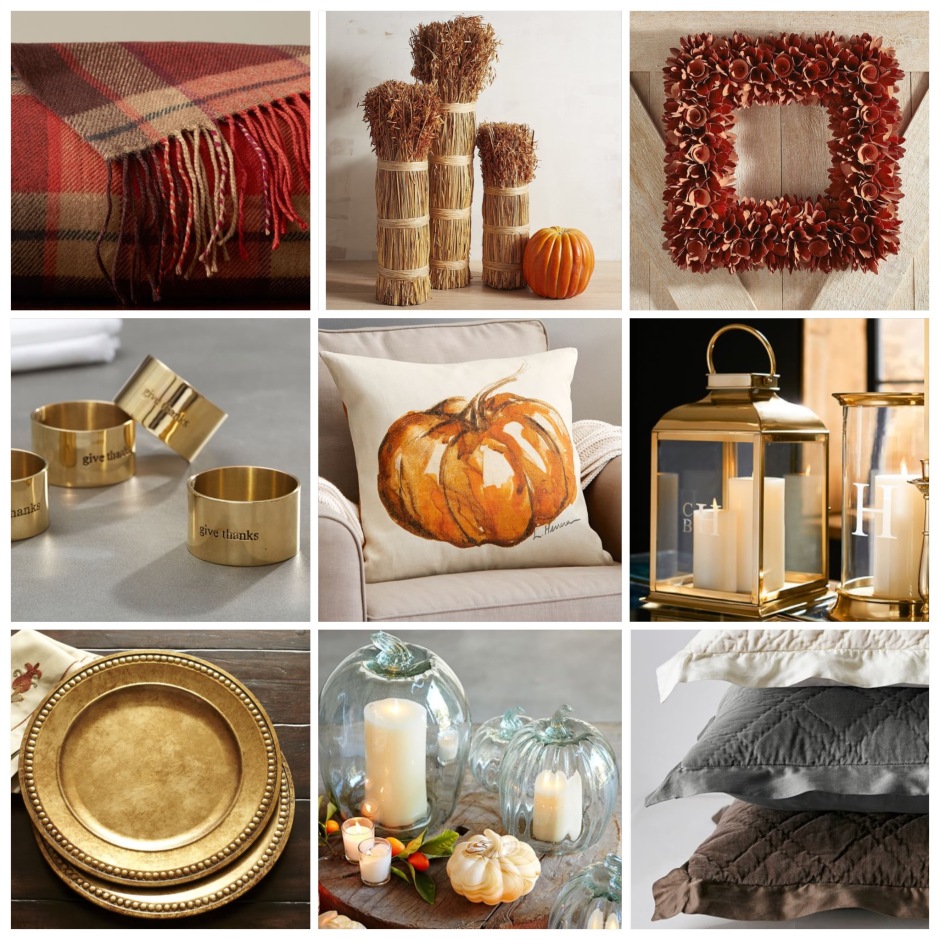
A Warm, rich harvest
I wanted to share a few of my favorite trends for fall. These fall items mix into your home easily to add warmth for the fall holiday.
1. Ronan Plaid Throw- Pottery Barn
2. Preserved Avena Bundle Stack Set- Pier 1
3. Woodcurl Orange 19″ Square Wreath – Pier 1
4. “Give Thanks” Napkin Ring Set of 4- Pottery Barn
5. Painted Pumpkin Patch Pillow Cover- Pottery Barn
6. Arlington Monogrammed Lantern-Pottery Barn
7. Beaded Guilt Charger-Pottery Barn
8. Recycled Glass Pumpkin Candle Cloche-Pottery Barn
9. Washed Velvet Silk Quilt and Sham-Pottery Barn
I love how each of these items adds personal touches through out your home. Each creates a memory- charming quotes on pillows, napkin rings or rustic chalkboards add personlized appeal. Hints of brass against warm fall colors in throws, linens and pillows adds class, and topiaries or greeneries bring the outdoors in.

I wanted to share how to add simple shelves to your kitchen or any other area of your home. These shelves are quite simple and can come in quite a few variations, depending on your own personal style. I chose simple black brackets ( nothing in my home stays for very long, as I am already looking into changing these a bit 😜) shown above, to add warmth and give an industrial feel. you can choose other finishes or even use chippy, old corbels for a real authentic farmhouse feel. Listed below is the supplies I used for the shelves.-
- 1 2×8 unfinished common board 8ft long ( locating some old barnwood and sealing it would add character as well)
- Two black shelf brackets ( whichever design you prefer) or any other form of bracket/corbel
- Minwax wood stain in dark walnut
- Rustoleum spray sealant ( easy and quick!)
You would also need a drill, level and stud finder to acuraetely and safely hang the shelves.
Really it’s all very easy:
- Measure and cut your 2×8 to your specifications ( mine were cut to 33 inches long to fit in my desired space) – if you have a wonderful husband to this part it is a big help! 😉
- Sand, stain and seal your shelves
- Allow to dry overnight – or for 6-8 hours
- Measure and mark where the holes will be drilled
- Drill and secure the brackets
- Once the brackets are up make sure to secure them with provided screws, to prevent slipping or tipping.
That’s all!! Really very simple-if you haven’t already built your farmhouse shelves.
I hope this Inspires you to be creative- thanks for stopping by!
~Jessica


I have always wanted to acquire a quaint little antique hutch to store my tableware and china from my grandmothers. I stumbled across a perfect cabinet in a small town antique store ( did I mention these are THE best antique stores!). It was tall, skinny and had great detail. Choosing the right paint color would be tough. I jumped in both feet and went with a beautiful charcoal blue. I just wanted to share a few of my thoughts on painting, distressing and styling a piece.
When choosing paint colors for furniture you want to consider where the piece will be placed, what function does it have, and what character the room it sits in has. If you want the piece to blend with the room stick to the same shades or hues that are already in the room. You may also choose a color that stands out, if the piece has a lot of detail or scroll work on it, choose colors that accent it. Think about your style and who you are, this will be a piece of furniture that you will see time after time. Listed are a few popular colors-
White: white is a great color if you are looking for a traditional farmhouse or modern, clean look. White is pretty safe, and will accent other pieces well. White is timeless and crisp.
Gray: Gray is such a popular color these days, Gray is the new black. It is of course one of my favorites. This color looks grand and sophisticated against white dishes or objects. Brass hardware is a big trend with gray this year.
Blues: Blue can be very rustic and clean at the same time. Blue can take on many different huues and can look great with clean white or patterned objects. Blue can also take on a teal hue, making it very rustic, farmhouse feel- think old pottery and dough bowls.
Distressing furniture can require a hand sander or regular sand paper, I usually use 100 to 150 grit. I always remember to sand where the piece would have the most wear and tear. Think of the doors, edges and legs. Start out lightly, then continue until you are happy with the results. Remember is piece was stained a lighter color that, you may have to darken with a another stain prior to painting it to achieve your desired look.
When styling a piece of furniture, keep in mind to use items in 3’s or odd numbers. display a low object such as a decorative bowl with taller ones like vases and photo frames.
Below are few of photos of the finished hutch- its all in the details! Thank you for stopping by.
-Jessica


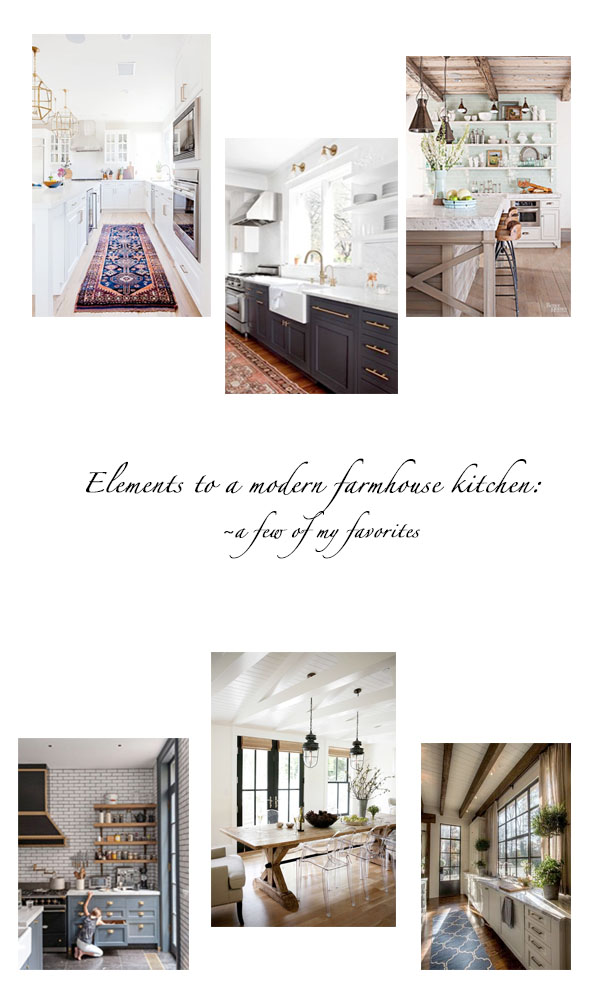 Recently I have updated a few things in our own kitchen, and I thought I would share some of my favorite trends for kitchens this year. While there are many elements to add to a kitchen, I wanted to name just a few. As most of you know, I am partial to the farmhouse look. Farmhouse sinks, subway tile and ship lap. I have found black and white accents can really make an impresson to a rustic farmhouse look as well. Think about adding black spindle dining chairs or bar stools to modernize a rustic space. I think your kitchen should be a place for gathering, grazing ( I had to put that in there, It seemed so appropriate) and creating memories. I spend a lot of time in mine with my family, wether it’s conversing about the day, having a meal together, doing school work , playing games or baking holiday treats. So I feel it’s one room in my home that I’m not afraid to invest in.
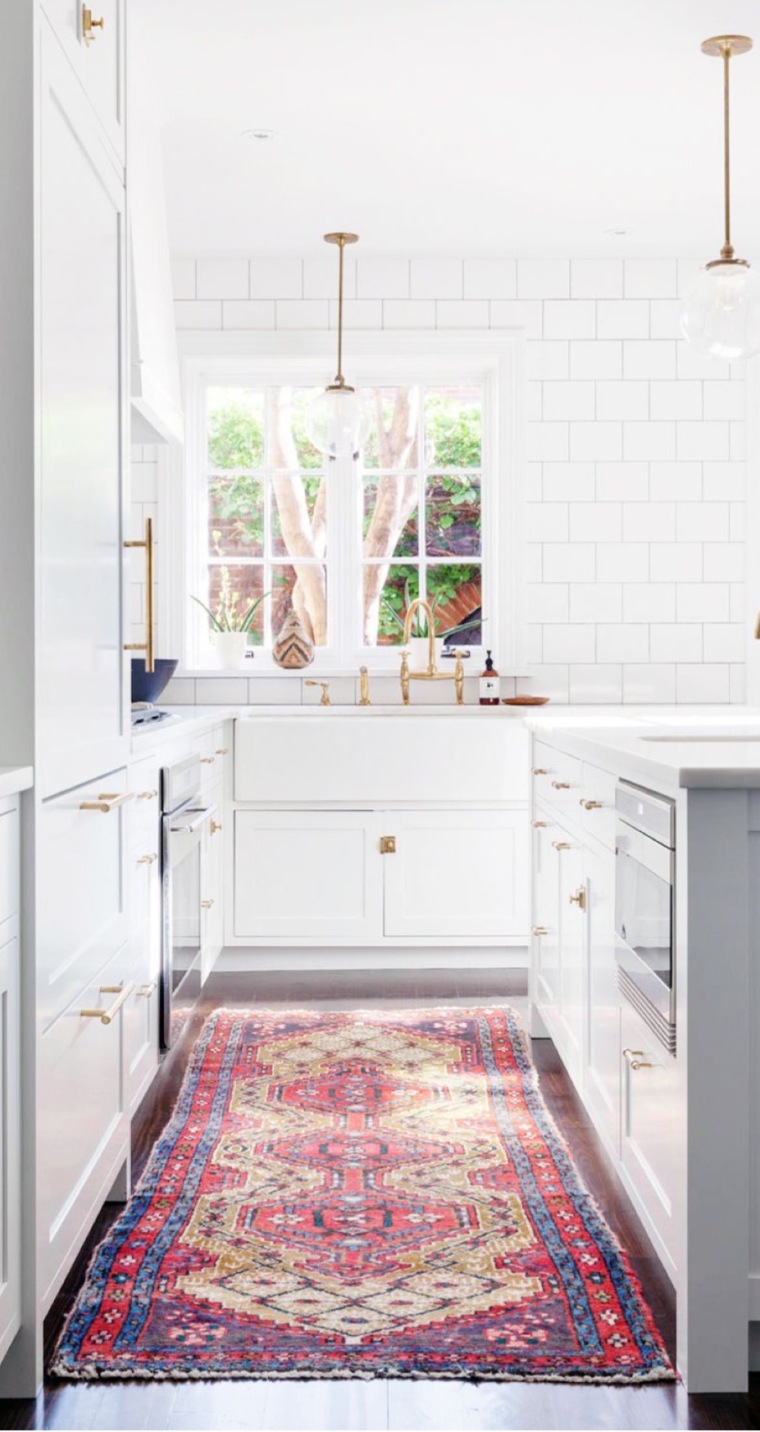
The first trend I am drawn to is featured in the photo below -vintage or vintage inspired kitchen runners. These fun rugs display eclectic, bright, bold colors with kilim and Moroccan patterns. Geometric rugs are popular too as they can bring a modern feel to a rustic space.
Lighting can make a space feel different in many ways. It is the accessory to a room. The right pendant or chandelier can give a space both a warm and inviting feel, but open as well. In a farmhouse space, such as a kitchen, lantern pendants or vintage chandeliers are appealing. They display a rustic look, with an open, airy feel. The kitchens below have both stunning and functions pendant lights.


Another key element to a farmhouse kitchen is open shelving. Open shelfs give you the chance to display any dishes or items, giving the space character and openness. Open shelving can be made with industrial pipes from your local hardware store ( some stores will cut the pipe to your desired length) ,wooden corbels ( the old, chippy ones are my favorite! ) and metal brackets. When displaying items on your shelves, give it your personal touch and add either a collection of old pottery, vintage trays ,wooden cutting boards or tin canisters.
Lastly, cabinet hardware can make a big impact on your kitchen. It’s like eye candy, 😜 drawing the eye in and bringing great detail to ordinary cabinets. Bin pulls, ice box locks and knobs all reminisce of a farmhouse kitchen. A big trend this year, is antique brass hardware with grey or white cabinets. These are my favorite combinations! Pictured below are a few of different options, there are so many to choose from! Don’t be afraid to paint your cabinets either-with proper research, equipment, materials and a little patience, you will be amazed at the transformation.


While there are many more elements to display in a farmhouse kitchen, I hope I have left you with just a few ideas to inspire you.
~Jessica
all images photo credit : Pinterest.

Chalk Painted French Chair
I stumbled across this old french inspired chair in an antique store one day. The price was an amazing steal! I took a look at the chair and saw what it could be- it had great appeal- a cottage, french country look to it, well in my mind it did. It was a good solid chair, comfortable and had good bones. The color, however was something a bit drab-burgundy. I had heard of using chalk paint on upholstered furniture, but was hestitant it would turn out. Well, I like to jump into things and be creative, so I thought why not-besides for the price I couldn’t pass up. I was so anxious to work on it! Look at the transformation..
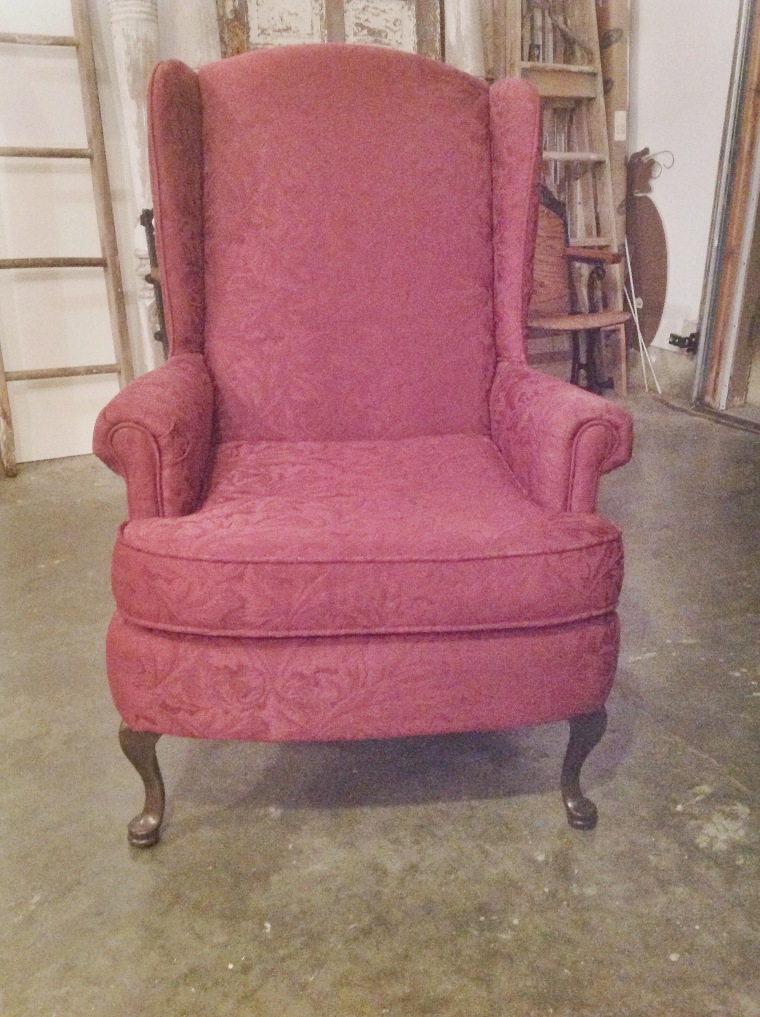
This is the chair before: isn’t she a beauty, wonderful lines but horrific color!
I knew I wanted to paint it a soft grey ( grey is such a neutral color ). I wanted the legs to be “chippy” white, to mimic wear and tear. So I chose a linen white chalk paint for the fabric and a white for the legs. I mixed equal parts of water and chalk paint together, and misted the fabric with a water bottle. I was a bit hesitant, but started painting the chair. I had done research prior to this and also attended a seminar showing this process. I let the chair dry overnight. I painted another coat, and yet another coat. Due to the darker burgundy color. I knew it would take a few coats. I stripped the legs down a bit with a sander and then applied a dark stain. I dry brushed some white paint over the top of that, and finally sanding the legs to give a vintage or worn appearance.
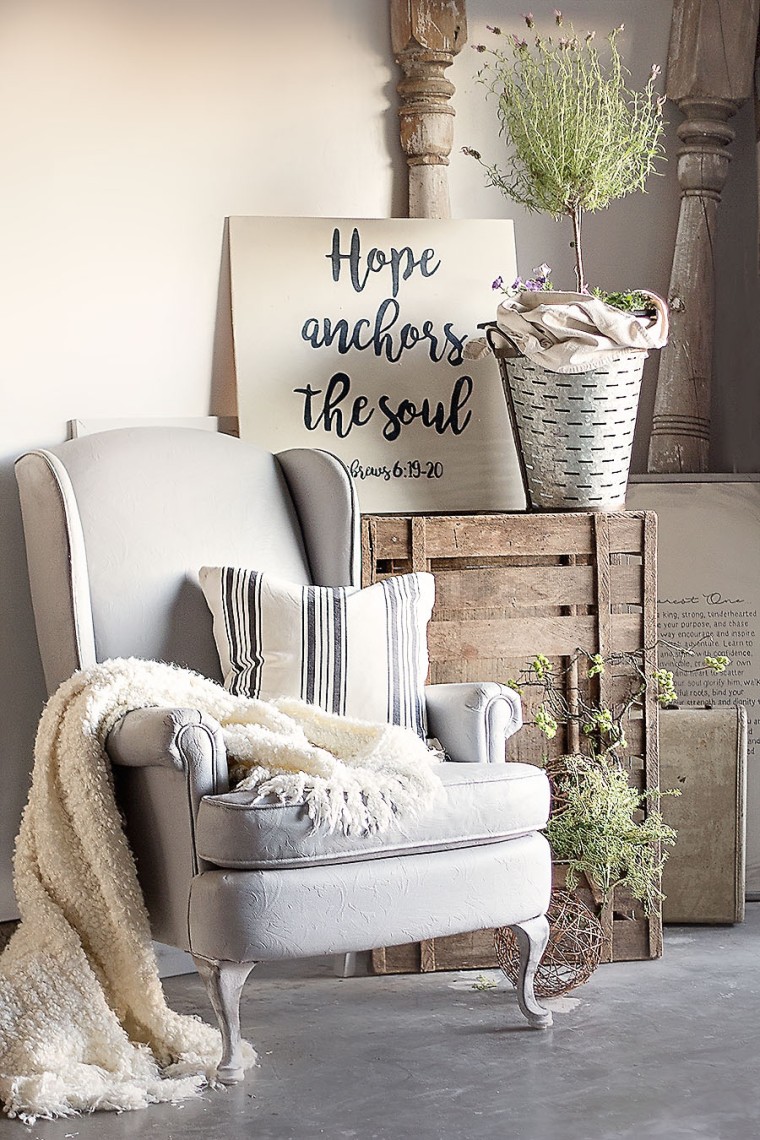
So here is the chair again- OH!! Take note of the wooden sign coming to my Etsy shop- PatinaGreyShop. This quote is one of my FAVORITES. Follow me on Facebook & Instagram- Jessica Jansma Photography & Design. I will post a grand opening event with your first order at 10% off.
 One of my favorite things to do with my kids is to go antiquing. I have a rule, that every time they go with me they receive a $1.00. If they choose to save it and not spend it they get another $1.00 the next time we all go together. Needless to say Ella, my 3 year old is catching on rather quickly. Watching them scavenger though the booths to find that perfect treasure to spend it on is rather entertaining.
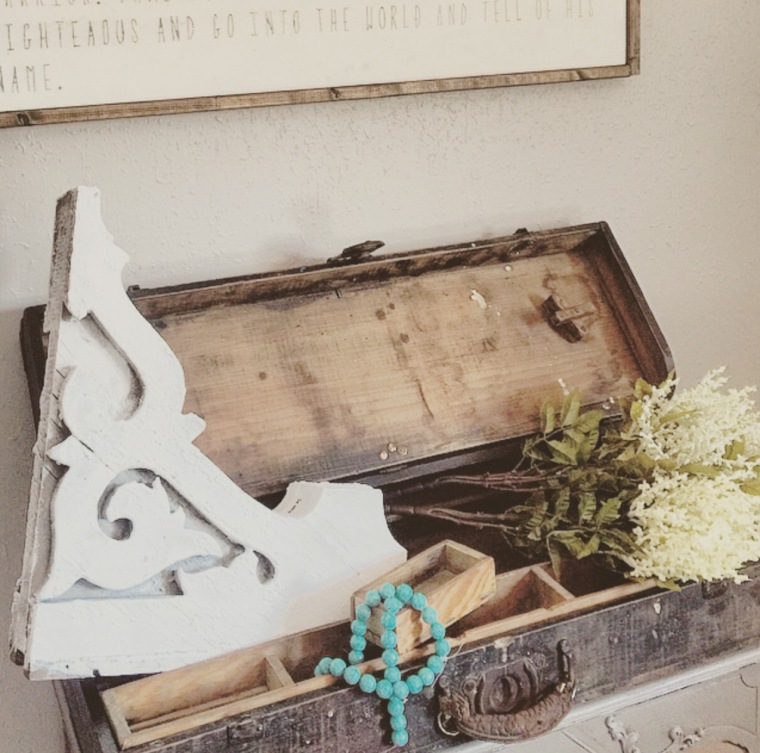
The other day I came across this beautiful rustic tool box, hand made. It has neat intricate detailing and hardware, with many compartments and storage inside. I knew I needed to repurpose it-I’m anxious to see what it will become in its next life. Any ideas??? If so comment below! I’d love to hear them? Possibly this too shall make a home in my shop. Stay tuned….for a grand opening on Etsy.
I can’t get enough of photography, I have been seeing through my lens some great families. I can’t wait to see what the summer season will bring. It reminds me that my camera hasn’t seen that beautiful smile on my youngest one-Landrie, since she turned one. I better get to that -milestones are too precious to pass up. Typically my children are not fans of the camera, so it takes some pursuassion, as well as a few quick minutes in between our busy life!
Progress….
Acknowledge the Lord in all that you do and he will make your paths straight and crown you with success ….. Proverbs 3:6

I wanted give a sneak peek into what I have been gathering and working on for my Etsy shop! I hope to intrigue and inspire you to stop on by, when the open sign is up. I have been setting goals daily in my business life as well as my family life at home. As a mom, wife and business woman I know that it can be challenging at time to juggle everything and having my Etsy shop is just another outlet for my creativity.
I wrapped up my Spring mini photo sessions and hope to share them with you soon. The Mothers Day sessions are so sweet, and I have met some neat families so far. I gave away an 8×10 barn wood frame from my ad , so don’t forget to like my page: jessicajansmaphotography&design/Facebook for more specials and giveaways!
I am working on a few projects as usual…until next time.

Repurposed brass lamp- Reveal
Remember that old brass lamp I found at an antique store? Here is the before photo in case you forgot.
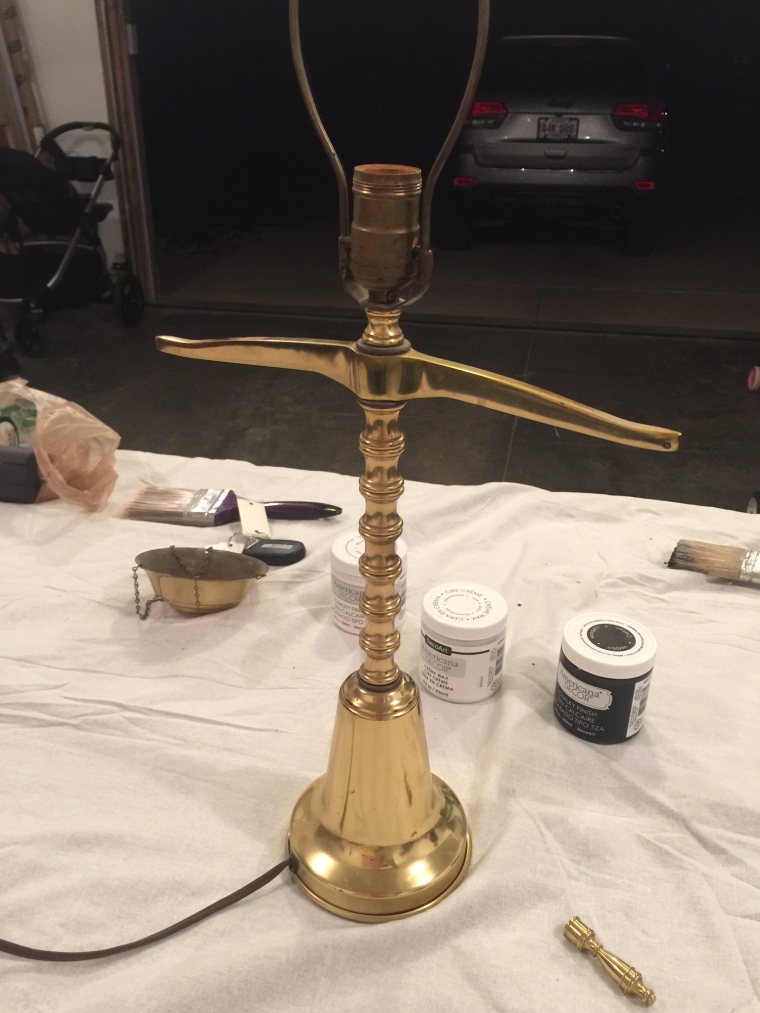
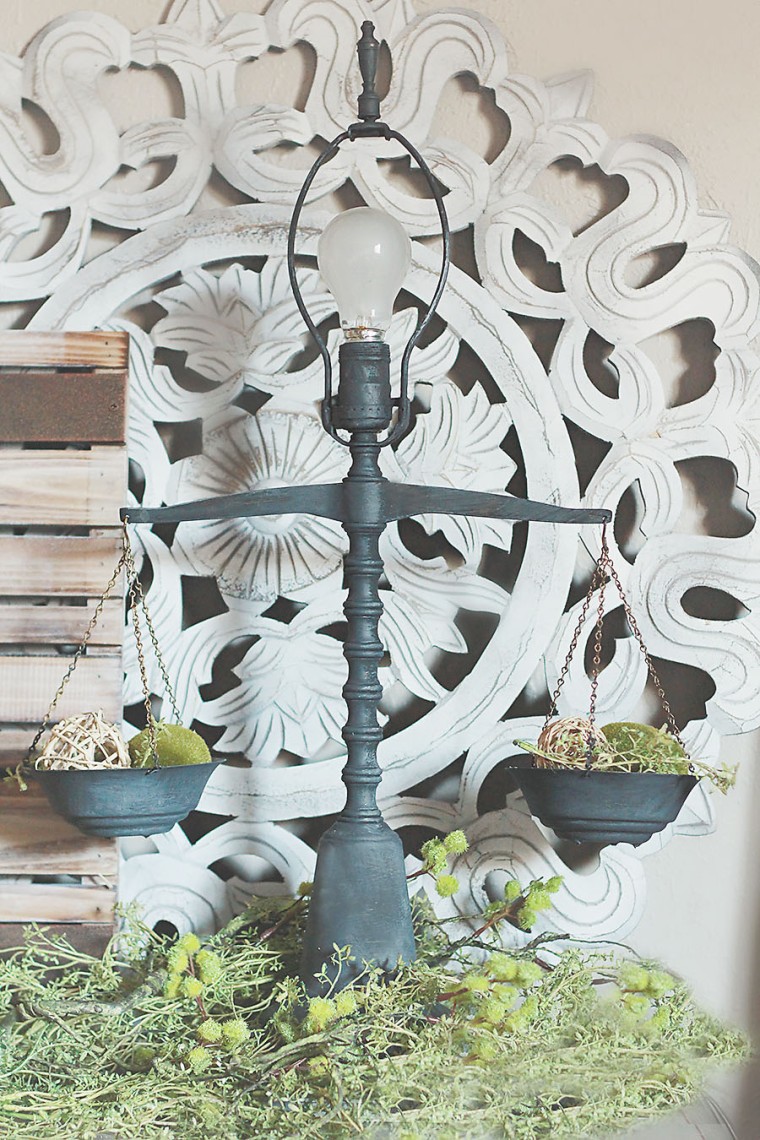
I purchased it for a mere $8! It was hidden amongst other worn out fixtures. So I started out by cleaning the brass lamp with a cloth. I wanted to give the lamp a worn iron look to it, something you would find in an old farmhouse. Next I used chalk paint in black. The nice thing about chalk paint is that you don’t have to worry about sealing or sanding prior to application.I applied it with a paint brush and a rag. I let that dry, then I applied the creme wax over the lamp to give it a worn out or rustic look. I opted not to apply a lamp shade, and plan to replace the working light bulb with a vintage filament bulb. I think by leaving the lamp shade off it creates a minimalist look to it. It turned out to be quite a unique and inexpensive piece don’t you think? Take a look-
Thank you for following me. Next, I am looking at a clever way to display photos and artwork made by my little ones….
